Widget Customizado
Requisitos:
- Ter um projeto já configurado com o Beagle.
Introdução
O Beagle já possui alguns widgets básicos que podem ser usados para alterar a sua aplicação UI através do backend. No entanto, você pode adicionar novos componentes para fazer as views da sua aplicação fiquem “visíveis” ao Beagle e que possam também ser usadas no backend.
Passo 1: Criar o componente customizado.
Abaixo temos a definição da classe do componente Box. Criada com view code em swift e possui um parâmetro title.
import Foundation
import UIKit

class Box: UIView {

    // Class parameter.
    private var title: String

    // Initialization part of the class.
    public init(title: String) {
        self.title = title
        super.init(frame: .zero)
        setupView()
    }

    required init?(coder: NSCoder) {
        fatalError("init(coder:) has not been implemented")
    }

    // Method to add component to hierarchy and pass position.
    private func setupView() {
        addSubview(label)

        label.text = title
        label.topAnchor.constraint(equalTo: topAnchor).isActive = true
        label.leadingAnchor.constraint(equalTo: leadingAnchor).isActive = true
        label.trailingAnchor.constraint(equalTo: trailingAnchor).isActive = true
        label.bottomAnchor.constraint(equalTo: bottomAnchor).isActive = true
    }

    // Component `UILabel` created.
    private lazy var label: UILabel = {
        let label = UILabel()
        label.font = .systemFont(ofSize: 20, weight: .bold)
        label.backgroundColor = .red
        label.textAlignment = .center
        label.textColor = .white
        label.translatesAutoresizingMaskIntoConstraints = false
        return label
    }()
}
Passo 2: Criar o Widget.
Para fazer seu componente ser visivel para o beagle basta criar uma struct e estender a interface Widget que é um protocolo que conforma com Decodable e é responsável por decodificar as propriedades que seu widget expõem ao backend, a interface irá adicionar a propriedade de widgetProperties e o método toView.
Agora com o componente Box crie uma struct BoxWidget adotando protocolo Widget, a interface widget irá adicionar a propriedade de widgetProperties e o método toView.
widgetProperties: A propriedade de aplicar estilo, id e acessibilidade.
toView: Método para retornar a view do componente criado.
Temos a estrutura da struct BoxWidget com os parâmetros title e widgetProperties, no método toView o componente Box estanciado passando o parâmetros title.
import Foundation
import UIKit
import Beagle

struct BoxWidget: Widget {

    // Class parameter.
    let title: String
    var widgetProperties: WidgetProperties

    // toView method of interface the  widget.
    func toView(renderer: BeagleRenderer) -> UIView {
        let boxComponent = Box(title: title)

        return boxComponent
    }
}
Temos que criar a parte de inicialização e decodificação do componente, tem duas maneiras possíveis usando o sourcery gerador de código para a linguagem Swift, ou fazendo manualmente.
Para fazer manual tem que criar o init e a decodificação dos parametros title e widgetProperties da struct BoxWidget.
O widgetProperties tem sua propria parte decodificação, entao é preciso apenas passar o decoder para o objeto WidgetProperties.
// Initialization part of the class.
public init(
    title: String,
    widgetProperties: WidgetProperties = WidgetProperties()
) {
    self.title = title
    self.widgetProperties = widgetProperties
}

// Enum with parameters for decoding.
enum CodingKeys: String, CodingKey {
    case title
}

// Initialization for decoding
public init(from decoder: Decoder) throws {
    let container = try decoder.container(keyedBy: CodingKeys.self)

    title = try container.decode(String.self, forKey: .title)
    widgetProperties = try WidgetProperties(from: decoder)
}
O Sourcery é uma ferramenta de geração de código que auxilia na criação de código boilerplate, ou seja, aqueles trechos de código incluídos em mais locais com pouca ou sem alteração.
A instalação dessa biblioteca é opcional, apesar de recomendada. Caso queira instalar, siga as instruções de como instalar e configurar nesse link
Para integrar o componente ao beagle é preciso utilizar o sizeThatFits ou AutoLayoutWrapper.
AutoLayoutWrapper
AutoLayoutWrapper: O objeto calcula o tamanho levando em consideração as contraints do componente.
Para isso basta adicionar a view do componente dentro do AutoLayoutWrapper.
Fazendo as configurações com o AutoLayoutWrapper.
let beagleWrapper = AutoLayoutWrapper(view: boxComponent)
Abaixo a struct completa do Widget com os passos:
- Adotar a interface
Widget. - Instanciar o componente Box.
- Fazer a parte de inicialização e decodificação do componente.
- Usar o
AutoLayoutWrapperna struct do BoxWidget.
import Foundation
import UIKit
import Beagle

struct BoxWidget: Widget {

    // Class parameter.
    let title: String
    var widgetProperties: WidgetProperties

    // Initialization part of the class.
    public init(
        title: String,
        widgetProperties: WidgetProperties = WidgetProperties()
    ) {
        self.title = title
        self.widgetProperties = widgetProperties
    }

    // Enum with parameters for decoding.
    enum CodingKeys: String, CodingKey {
        case title
    }

    // Initialization for decoding
    public init(from decoder: Decoder) throws {
        let container = try decoder.container(keyedBy: CodingKeys.self)

        title = try container.decode(String.self, forKey: .title)
        widgetProperties = try WidgetProperties(from: decoder)
    }

    // toView method of interface the  widget.
    func toView(renderer: BeagleRenderer) -> UIView {

        // Native component declaration.
        let boxComponent = Box(title: title)

        // Setting the beagle wrapper.
        boxComponent.translatesAutoresizingMaskIntoConstraints = false
        let beagleWrapper = AutoLayoutWrapper(view: boxComponent)

        // Returning BeagleWrapper and component.
        return beagleWrapper
    }
}
SizeThatFits
sizeThatFits: Método para implementar sua lógica de tamanho, usado na classe do componente customizado.
override func sizeThatFits(_ size: CGSize) -> CGSize {
    systemLayoutSizeFitting(size)
}
A classe do componente customizado com o passo:
- Usar o sizeThatFits.
import Foundation
import UIKit

class Box: UIView {

    // Class parameter.
    private var title: String

    // Initialization part of the class.
    public init(title: String) {
        self.title = title
        super.init(frame: .zero)
        setupView()
    }

    required init?(coder: NSCoder) {
        fatalError("init(coder:) has not been implemented")
    }

    // Implementation sizeThatFits
    override func sizeThatFits(_ size: CGSize) -> CGSize {
        systemLayoutSizeFitting(size)
    }

    // Method to add component to hierarchy and pass position.
    private func setupView() {
        addSubview(label)

        label.text = title
        label.topAnchor.constraint(equalTo: topAnchor).isActive = true
        label.leadingAnchor.constraint(equalTo: leadingAnchor).isActive = true
        label.trailingAnchor.constraint(equalTo: trailingAnchor).isActive = true
        label.bottomAnchor.constraint(equalTo: bottomAnchor).isActive = true
    }

    // Component `UILabel` created.
    private lazy var label: UILabel = {
        let label = UILabel()
        label.font = .systemFont(ofSize: 20, weight: .bold)
        label.backgroundColor = .red
        label.textAlignment = .center
        label.textColor = .white
        label.translatesAutoresizingMaskIntoConstraints = false
        return label
    }()
}
Classe completa do Widget com passos.
- Adotar a interface
Widget. - Instanciar o componente Box.
- Fazer a parte de inicialização e decodificação do componente.
import Foundation
import UIKit
import Beagle

struct BoxWidget: Widget {

    // Class parameter.
    let title: String
    var widgetProperties: WidgetProperties

    // Initialization part of the class.
    public init(
        title: String,
        widgetProperties: WidgetProperties = WidgetProperties()
    ) {
        self.title = title
        self.widgetProperties = widgetProperties
    }

    // Enum with parameters for decoding.
    enum CodingKeys: String, CodingKey {
        case title
    }

    // Initialization for decoding
    public init(from decoder: Decoder) throws {
        let container = try decoder.container(keyedBy: CodingKeys.self)

        title = try container.decode(String.self, forKey: .title)
        widgetProperties = try WidgetProperties(from: decoder)
    }

    // toView method of interface the  widget.
    func toView(renderer: BeagleRenderer) -> UIView {

        // Native component declaration.
        let boxComponent = Box(title: title)

        // Returning BeagleWrapper and component.
        return boxComponent
    }
}
Passo 3: Registrar o Widget.
É obrigatório registrá-lo no Beagle. Dentro do arquivo de configuração do beagle utilize o dependencies para registar.
O método register possui dois construtores, o primeiro passando apenas o component e segundo recebendo o component e named.
component: Passa a classe do componente.
named: Parâmetro para setar o nome do componente. Não é obrigatório passar. Um caso é quando o nome do componente é registrado diferente com que você criou no backend. Ele será usado na deserializações para encontrar seu componente.
Maneiras de Registrar
// 1º maneira.
dependencies.decoder.register(component: BoxWidget.self)
// 2º maneira.
dependencies.decoder.register(component: BoxWidget.self, named: "BoxWidgetComponent")
Após registrar, não esqueça que para usar seu componente no backend ele tambem tem que ser registrado no seu BFF(Backend for Frontend).
Caso queira entender sobre BFF click aqui
Passo 4: Declaração do componente.
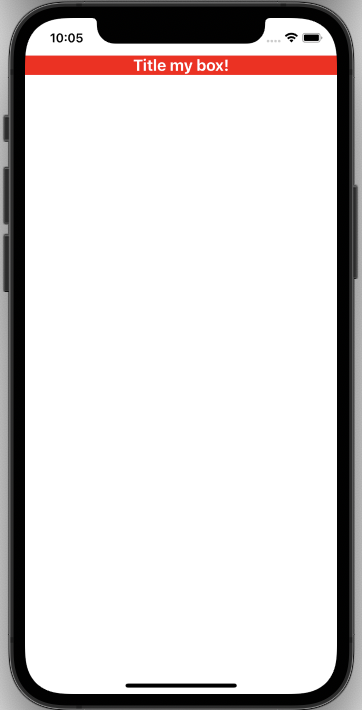
Abaixo temos a definição do componente dentro de um Container, onde o componente BoxWidget possui o parâmetro title que recebe o valor Title my box!.
 Container {
    BoxWidget(title: "Title my box!")
}
Exemplo renderizado:
Se você usar componentes mais complexos que estejam no UIViews ou outros componentes não mencionados, o processo seria parecido.
Feedback
Was this page helpful?
Glad to hear it! Please tell us how we can improve.
Sorry to hear that. Please tell us how we can improve.