⚠️ You are viewing documentation for version: v1.5
Beagle v1.5 is no longer actively maintained. The documented version you are viewing may contain deprecated functionality. For up-to-date documentation, see the latest version .
React
Usage configurations
After you finished the installation, you need to make Beagle’s usage configuration for React’s framework. To do so, you just have to follow these steps:
Step 1: Create a JSON to be rendered
On your React project, in the public folder, create a file named payload.json and copy the code below. This file will map the components that will be rendered by Beagle. Generally, it would be returned by a external server, but on this example, you’ll make a local JSON file to be rendered with Beagle’s library. .
{
"_beagleComponent_": "beagle:container",
"children": [
{
"_beagleComponent_":"beagle:text",
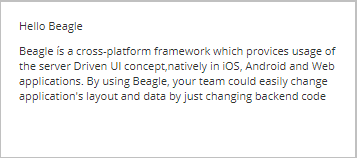
"text":"Hello Beagle"
},
{
"_beagleComponent_":"beagle:text",
"style":{
"padding":{
"top":{
"value":10,
"type": "REAL"
}
}
},
"text":"Beagle is a cross-platform framework which provides usage of the server Driven UI concept,natively in iOS, Android and Web applications. By using Beagle, your team could easily change application's layout and data by just changing backend code"
}
]
}
Beagle’s library comes with many pre-defined components ready to be used in their project.
The code above creates a JSON with two os these components: container and text.
Step 2: Create a configuration file
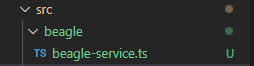
After you add the JSON on your project, create another file in the path /src, but this time with the name Beagle. Inside it, name a new file as beagle-service.ts.
Once you made it, your structure must be similar to the image below:
Now open the beagle-service.ts file and copy this code:
import { createBeagleUIService } from '@zup-it/beagle-react'

export default createBeagleUIService({
  baseUrl: "",
  components: {}
})
At this point of the configuration, you can add, for example, a path to Beagle’s external server. The most indicated is to let the baseUrl propriety without value because you’ll use a local file (payload.json) for this example.
Step 3: Using BeagleRemoteView
Now you need to specify inside the application, the place where the components will be rendered. For that, open Beagle’s library that provides BeagleRemoteView and BeagleProvider. Open the component file where you want the JSON to be rendered and change it as in the example below:
import React from 'react';
import './App.css';
import { BeagleProvider, BeagleRemoteView } from '@zup-it/beagle-react';
import BeagleService from './beagle/beagle-service';

function App() {
  return (
    <BeagleProvider value={BeagleService}>
      <BeagleRemoteView route={'/payload.json'} />
    </BeagleProvider>
  );
}

export default App;
When you make this note, you indicate to Beagle that the defined layout will be rendered on payload.json file. In this case, two components are provided on the library:
<BeagleProvider>: Responsible to provide avaluepropriety asbeagle-servicecreated on the previous step and contains the initial configurations;<BeagleRemoteView>: Responsible to render the layout defined by the JSON specified by therouteproperty.
baseUrl on the beagle-service.ts file.route in the BeagleRemoteView is only valid for versions 1.3.0 and above. For earlier versions, please, use path instead.Use Example
Test the project
Before you test if the configuration worked, you have to run one of the commands below to initialize the application:
yarn start
npm run start
After finished this commands, access the local: localhost:3000
You will see this screen:
Feedback
Was this page helpful?
Glad to hear it! Please tell us how we can improve.
Sorry to hear that. Please tell us how we can improve.