⚠️ You are viewing documentation for version: v1.6
Beagle v1.6 is no longer actively maintained. The documented version you are viewing may contain deprecated functionality. For up-to-date documentation, see the latest version .
Android
Currently, there are two types of approaches to render screens with Beagle: remote and local.
In this tutorial below, you will do the configuration and build a local screen. To learn how to configure and build a remote screen, follow the tutorial creating a project from scratch
Usage configurations
Once you have finished Beagle’s installation, you have to make now our tool’s usage configuration. To make this process easier, we’ll use an example of how to render a “Hello Beagle! screen with a small description.
Step 1: Create a BeagleConfig class
After the update, you have to create a BeagleConfig class and configure your attributes, as you can see on the example below:
@BeagleComponent
class AppBeagleConfig : BeagleConfig {
    override val environment: Environment get() = Environment.DEBUG
    override val baseUrl: String get() = "https://myapp.server.com"
    override val isLoggingEnabled: Boolean = true
    override val cache: Cache = Cache(
        enabled = false,
        maxAge = 300,
        size = 15
    )
}
| Attribute | Type | Definition |
|---|---|---|
| environment | Environment | Attribute responsible for informing Beagle about the current build status of the application. |
| baseUrl | String | Informs the base URL used in Beagle in the application. If you are using the emulator, check here to define this attribute. |
| isLoggingEnabled | Boolean | Attribute that enables or disables all logs that Beagle generates. |
| cache | Cache | Object responsible for managing the cache of Beagle requests. |
BeagleComponent, because Beagle expect them to have empty constructors.Step 2: Initiate Beagle and the Design System
Now it’s the moment to initiate Beagle in your application’s class. However, before you start check out if the minimum version of your SDK is above 19, as in the example:
defaultConfig {
    minSdkVersion 19 //or higher
}
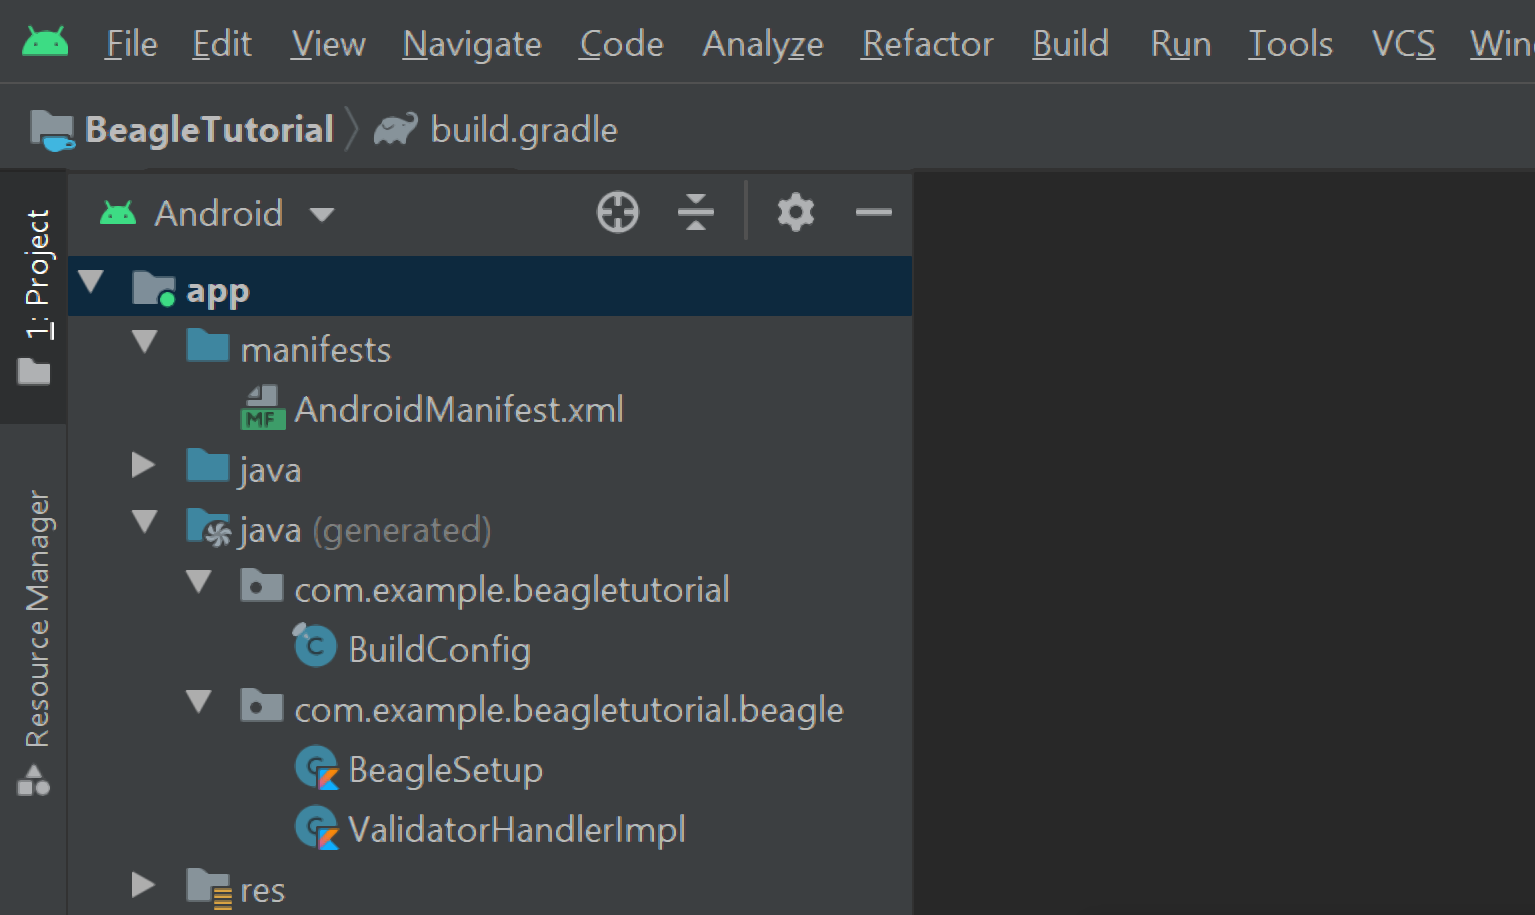
Step 3: Create a BeagleSetup
Now you have to initialize your Application, so Beagle can generate other configuration files that you need. When you initialize Beagle for the first time, a BeagleSetup class will be automatically created as you can see in the image below:
Step 4: Create the Application class
At this moment, you should create a Kotlin class that extends the Application class. For this example, the name will be AppApplication.
This class should be named as BeagleSetup().init(this) on onCreate method, according to the list below:
class AppApplication: Application() {

    override fun onCreate() {
        super.onCreate()

        BeagleSetup().init(this)
    }
}
Step 5: Update your Android Manifest.xml
Finally, you must update again your AndroidManifest.xml and define the AppApplication created as an application’s initialization file. See the example below:
<?xml version="1.0" encoding="utf-8"?>
<manifest xmlns:android="http://schemas.android.com/apk/res/android"
    package="com.example.beagleexamples">

    <uses-permission android:name="android.permission.INTERNET" />

    <application
        android:name=".AppApplication"

        ..
Now you’re ready to start using Beagle! To verify if the configuration is correct, you can simulate a Server-Driven screen to make the following test.
Use Example
How to display a declarative screen
Once you have already configured Beagle, every server-driven screen you build on your application’s backend will be sent to frontend through a JSON.
To test our application, you can make a simulation of a server-driven screen creating a JSON that represents a screen of tour Android application.
Follow these steps to make this exhibition:
- Open the file
MainActivity.kt; - State the line below on
OnCreatefunction; - Add the a command line
test_content.addView(testScreen().toView(this)) - Notice that the test_content doesn’t exist because you will still name this reference.
override fun onCreate(savedInstanceState: Bundle?) {
    super.onCreate(savedInstanceState)
    setContentView(R.layout.activity_main)
    test_content.addView(testScreen().toView(this))
}
To access the view test_content as the example above, it is necessary to install the plugin:
plugins {
    id 'kotlin-android-extensions'
}
- Open the
.xmllayout file of Main Activity and create a Frame layout.
As a default, Android usually creates .xml files with constraint layout. You don’t need to remove it, just add a layout frame inside it and check out if the configurations are similar to the example below:
activity_main.xml

<FrameLayout xmlns:android="http://schemas.android.com/apk/res/android"
    android:layout_width="match_parent"
    android:layout_height="match_parent"
    android:id="@+id/test_content" />
- Now, you just have to return to MainActivity.kt page and state the function below. It’s responsible to list JSON to test the screen.
MainActivity.kt

private fun testScreen() = Screen(
    child = Container(
      children = listOf(
        Text(
          text = "Hello Beagle!"
        ).applyStyle(
          Style(margin = EdgeValue(top = 16.unitReal()),
            flex = Flex(alignSelf = AlignSelf.CENTER)
          )
              ),
        Text(
          text = "Beagle is a cross-platform framework which provides usage of the " +
                      "Server-Driven UI concept, natively in iOS, Android and Web applications. " +
                      "By using Beagle, your team could easily change application's layout and" +
                      " data by just changing backend code."
        ).applyStyle(
          Style(margin = EdgeValue(
            left = 16.unitReal(),
            right = 16.unitReal(),
            top = 20.unitReal()
          )
          )
        )
      )
    )
  )
The function above creates a JSON structure, check it below, it will be interpreted by Beagle:
{
  "_beagleComponent_" : "beagle:screenComponent",
  "child" : {
    "_beagleComponent_" : "beagle:container",
    "children" : [ {
      "_beagleComponent_" : "beagle:text",
      "text" : "Hello Beagle!",
      "style" : {
        "margin" : {
          "top" : {
            "value" : 16.0,
            "type" : "REAL"
          }
        },
        "flex" : {
          "alignSelf" : "CENTER"
        }
      }
    }, {
      "_beagleComponent_" : "beagle:text",
      "text" : "Beagle is a cross-platform framework which provides usage of the Server-Driven UI concept, natively in iOS, Android and Web applications. By using Beagle, your team could easily change application's layout and data by just changing backend code.",
      "style" : {
        "margin" : {
          "left" : {
            "value" : 16.0,
            "type" : "REAL"
          },
          "top" : {
            "value" : 20.0,
            "type" : "REAL"
          },
          "right" : {
            "value" : 16.0,
            "type" : "REAL"
          }
        }
      }
    } ]
  }
}
- Click on
Run appand check the emulator screen!
You will see this screen:
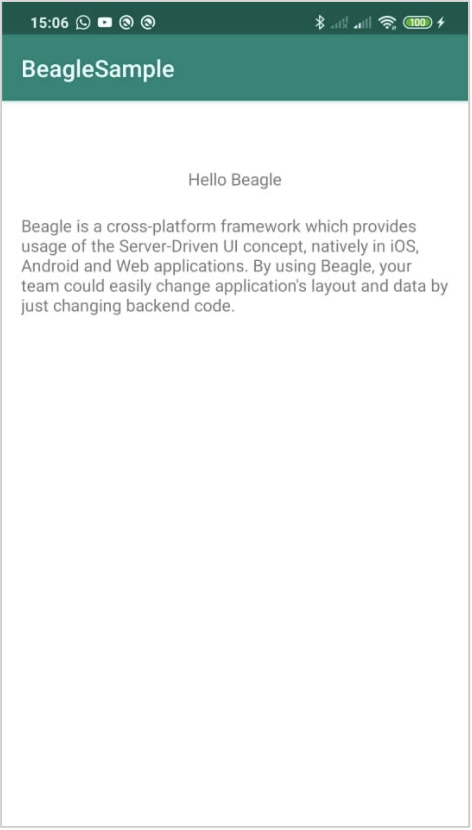
This tutorial focused in a simple screen configuration, so you could understand the process and without worrying about screens' hierarchy.
Additional Information
Before you use Beagle, stay tuned about: the release build configuration and ProGuard.
Even though it’s not necessary at this moment, it’s good to have in mind that you’ll have to configure the ProGuard to activate the obfuscate code when you publish releases.
BeagleComponent and RegisterValidator can’t implement parameters in your constructors because, on Beagle, these constructors must be empty.Feedback
Was this page helpful?
Glad to hear it! Please tell us how we can improve.
Sorry to hear that. Please tell us how we can improve.