


Overview
Here, you’ll find a tutorial to start an Android project with Beagle.
For this practical example, we’ll use Android Studio IDE. In case you still don’t have it installed, just access on official Android website and follow the instructions.
After you installed the program, follow the steps below:
Step 1: Open Android Studio and click on Start a new Android Studio project.
Step 2: Choose the Empty Activity option and click on next.
Step 3️: On this page, there are some important information:
BeagleApp.Kotlin.Step 4️: After you made the previous configurations, Android will take some time to build the project because it will be synchronizing all the initials dependencies to initialize the project
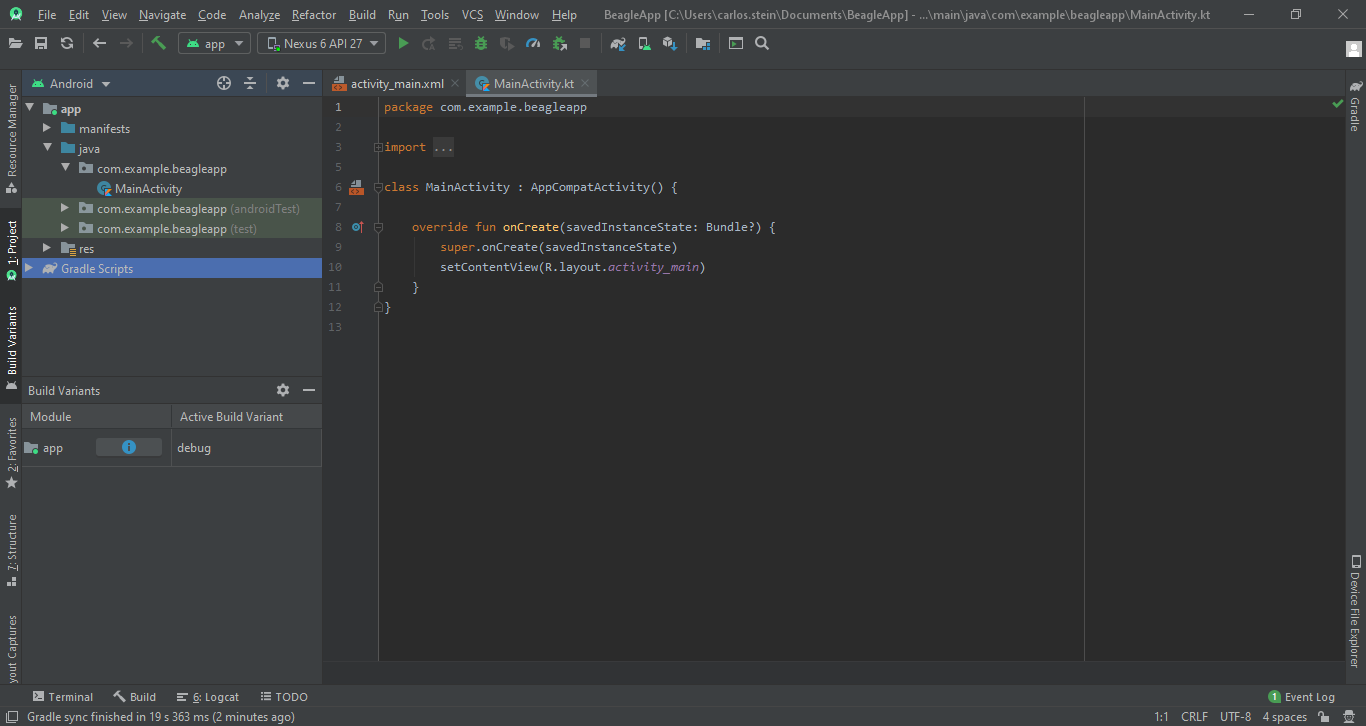
Once the initialization is done, you will see this page:
To start, you have to configure Beagle’s dependencies on your repository. This can be done using the configurations below and downloading Beagle’s library.
Graddle scripts file on the project.gradle name. Open the first one named.build.graddle(project:Beagle).allprojects code block and configure Maven credentials as you see in the list below:// Add it in your root build.gradle at the end of repositories:
allprojects {
repositories {
google()
mavenCentral()
}
}
build.graddle(project:Beagle) file.Once you made it, we should include kapt plugin and Beagle as dependencies on dependency manager. To do so, follow these instructions:
build.graddle(Module:app) fileNotice that some plugins are already listed on the beginning of the file as shown below:
apply plugin: 'kotlin-kapt'_
After that, you need to add some dependencies:
dependencies { }code block.ext.beagle_version variable on the top (in this case, out of) the dependencies scope
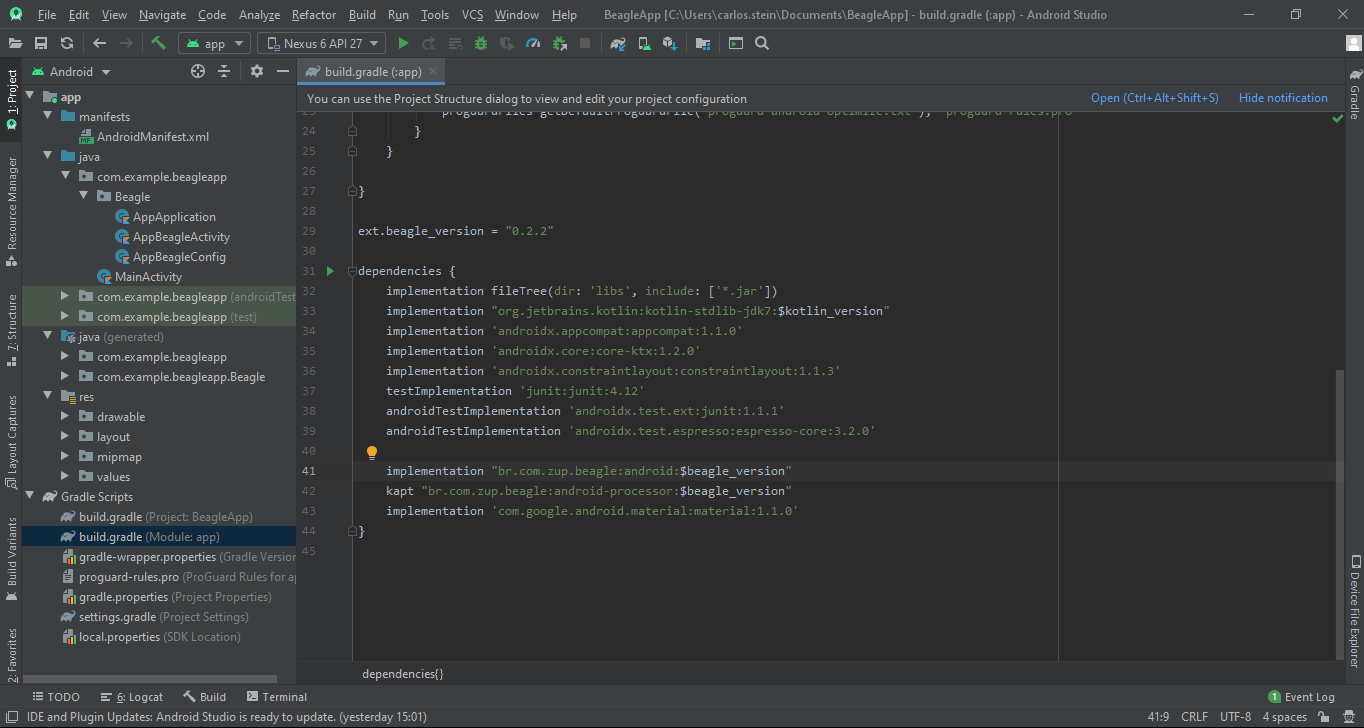
Copy and paste the lines below inside your dependencies:
// Add in your app level dependency
ext.beagle_version = "${beagle_version}"

dependencies {
    implementation "br.com.zup.beagle:android:$beagle_version"
    kapt "br.com.zup.beagle:android-processor:$beagle_version"
}
Add Beagle’s release version instead of ${beagle.version}, you should put Beagle’s version highlighted like the blue badge above without the v character.
For example: undefined-ext.beagle.version = "1.8.0"
At the end of these configurations, your file must be like this:
The next step is to update your Android Manifest project by adding a few lines to the file:
<uses-permission android:name="android.permission.INTERNET" />If you find difficulties to find this or another file, just use Android Studios search bar.
To enable it, press SHIFT button twice and the search interface will appear. Once you made it, just just have to type AndroidManifest and Android Studio will find it.
<?xml version="1.0" encoding="utf-8"?>
<manifest xmlns:android="http://schemas.android.com/apk/res/android"
    package="com.example.beagleexamples">

    <uses-permission android:name="android.permission.INTERNET" />

    <application
        ...
        android:usesCleartextTraffic="true"
        ...
Let this file open because we’ll use it again in another moment.
true”. Apps that target API level 28 or higher default to “false”.android:usesCleartextTraffic="true" inside <application>tag is used to communicate with the local BFF. Them if you intent to debug the project using a local BFF you can use this as an easy configuration step.networkSecurityConfig which you can configure using android developers page instructions.Now that your project is created, you must configure Beagle settings. To do this, follow the steps below:
Beagle does not provide a Network, Cache or Logger configuration on its default components, so those must be configured for Beagle to work as expected. You can create your own defaults configurations following the examples below:
For the next steps, you should create an AppBeagleConfig class, that is part of Beagle’s installation and it’s responsible to register some important configurations.
When you create the call, we should guarantee that it’s configured in this way:
@BeagleComponentBeagleConfigclass.To create AppBeagleConfig, follow these steps:

Even though you can name the file as you want to, we’ll recommend for this tutorial that you use the namebeagle.
3. Click with the right button on beagle's package and click on **new>Kotlin File/Class**
__4. __Name it as AppBeagleConfig and then press ENTER
AppBeagleConfig file you just created. Notice that it will implement two attributes: baseUrl and environment.baseUrl returns the basis URL of your environment.environment returns the current build state of your application.isLoggingEnabled returns the application’s log viewcache manager configuration.import br.com.zup.beagle.android.annotation.BeagleComponent
import br.com.zup.beagle.android.setup.BeagleConfig
import br.com.zup.beagle.android.setup.Cache
import br.com.zup.beagle.android.setup.Environment
@BeagleComponent
class AppBeagleConfig : BeagleConfig {
override val baseUrl: String get() = "http://10.0.2.2:8080" // return the base url based on your environment
override val environment: Environment get() = Environment.DEBUG // return the current build state of your app
override val isLoggingEnabled: Boolean = true
override val cache: Cache get() = Cache(
enabled = true, // If true, we will cache data on disk and memory.
maxAge = 300, // Time in seconds that memory cache will live.
memoryMaximumCapacity = 15 // Memory LRU cache size. It represents number of screens that will be in memory.
) // Cache management configuration
}
At this tutorial point, we will test our Server-Driven screens on local host because it’s important that our baseURL be local.
Now, Beagle expects that your @BeagleComponent classes must have only empty constructors.
Beagle offers a default Activity to manage all server-driven activities. However, it is possible to create a more specific activity to handle server-driven screens differently. You will create a new activity inherited from BeagleActivity and it will annotate with @BeagleComponent. Check more information on how to create one at the Beagle Activity page.
What is Design System?
For more information, see section Design System with Beagle Android.
The design system keeps the style components registry created in the frontend and that is how your application will know which style component must be applied on each Server-Driven element. It is on the server-drive screen the visual elements (views) are used on the construction of your screen.
Even if you can create it now, if you want to, it is not necessary to the initial configuration in order to test Beagle faster. You can proceed without configurating it. For more information see Design System on Beagle for Android.
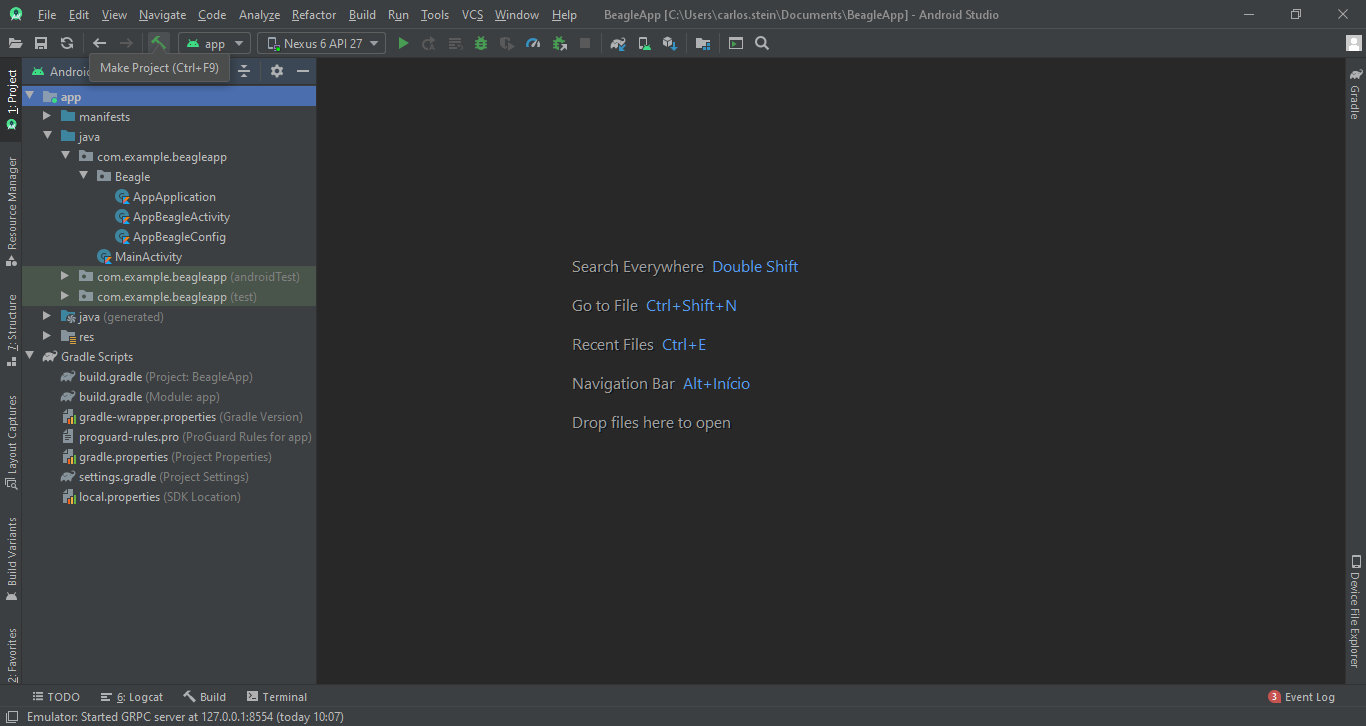
Now , you must initialize your Application so Beagle can manage the other configuration’s files. To do so, just click onMake project (HAMMER symbol) or use the command CTRL + F9.
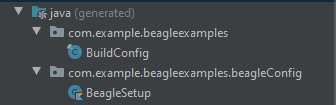
When it’s initialized, Beagle will automatically create a BeagleSetup file that will be in the folder with the generated files, like in the image below:
On this step, you need to create aKOTLIN class that extends to the Applicationclass. For this example, we’ll name it asAppApplication.
It’s necessary to make some configurations on this folder so it can BeagleSetup().init(this) function on your onCreate method. Follow these steps:
new > Kotlin file/classAppApplication and press enterclass AppApplication: Application() {
override fun onCreate() {
super.onCreate()
BeagleSetup().init(this)
}
}
The name of yourapplication now it’s the same of the class you created. Update the Android Manifest as it’s indicated below:
<?xml version="1.0" encoding="utf-8"?>
<manifest xmlns:android="http://schemas.android.com/apk/res/android"
    package="com.example.beagleexamples">

    <uses-permission android:name="android.permission.INTERNET" />

    <application
        android:name=".AppApplication"

        ...
All you have to do now is set up a backend to answer your application’s requests. Once you made this configuration, start your application and you’ll see your first server-driven screen!
It’s very simple to show a server-driven screen. Now that all Beagle’s configuration is done, you just have to follow these steps:
MainActivity.ktintent as listed below. It will define the address of screen’s information on the backend you configured.intent listed below on onCreate method.val intent = this.newServerDrivenIntent<AppBeagleActivity>(ScreenRequest("/screen"))
startActivity(intent)
finish()
MainActivity.kt must be like this: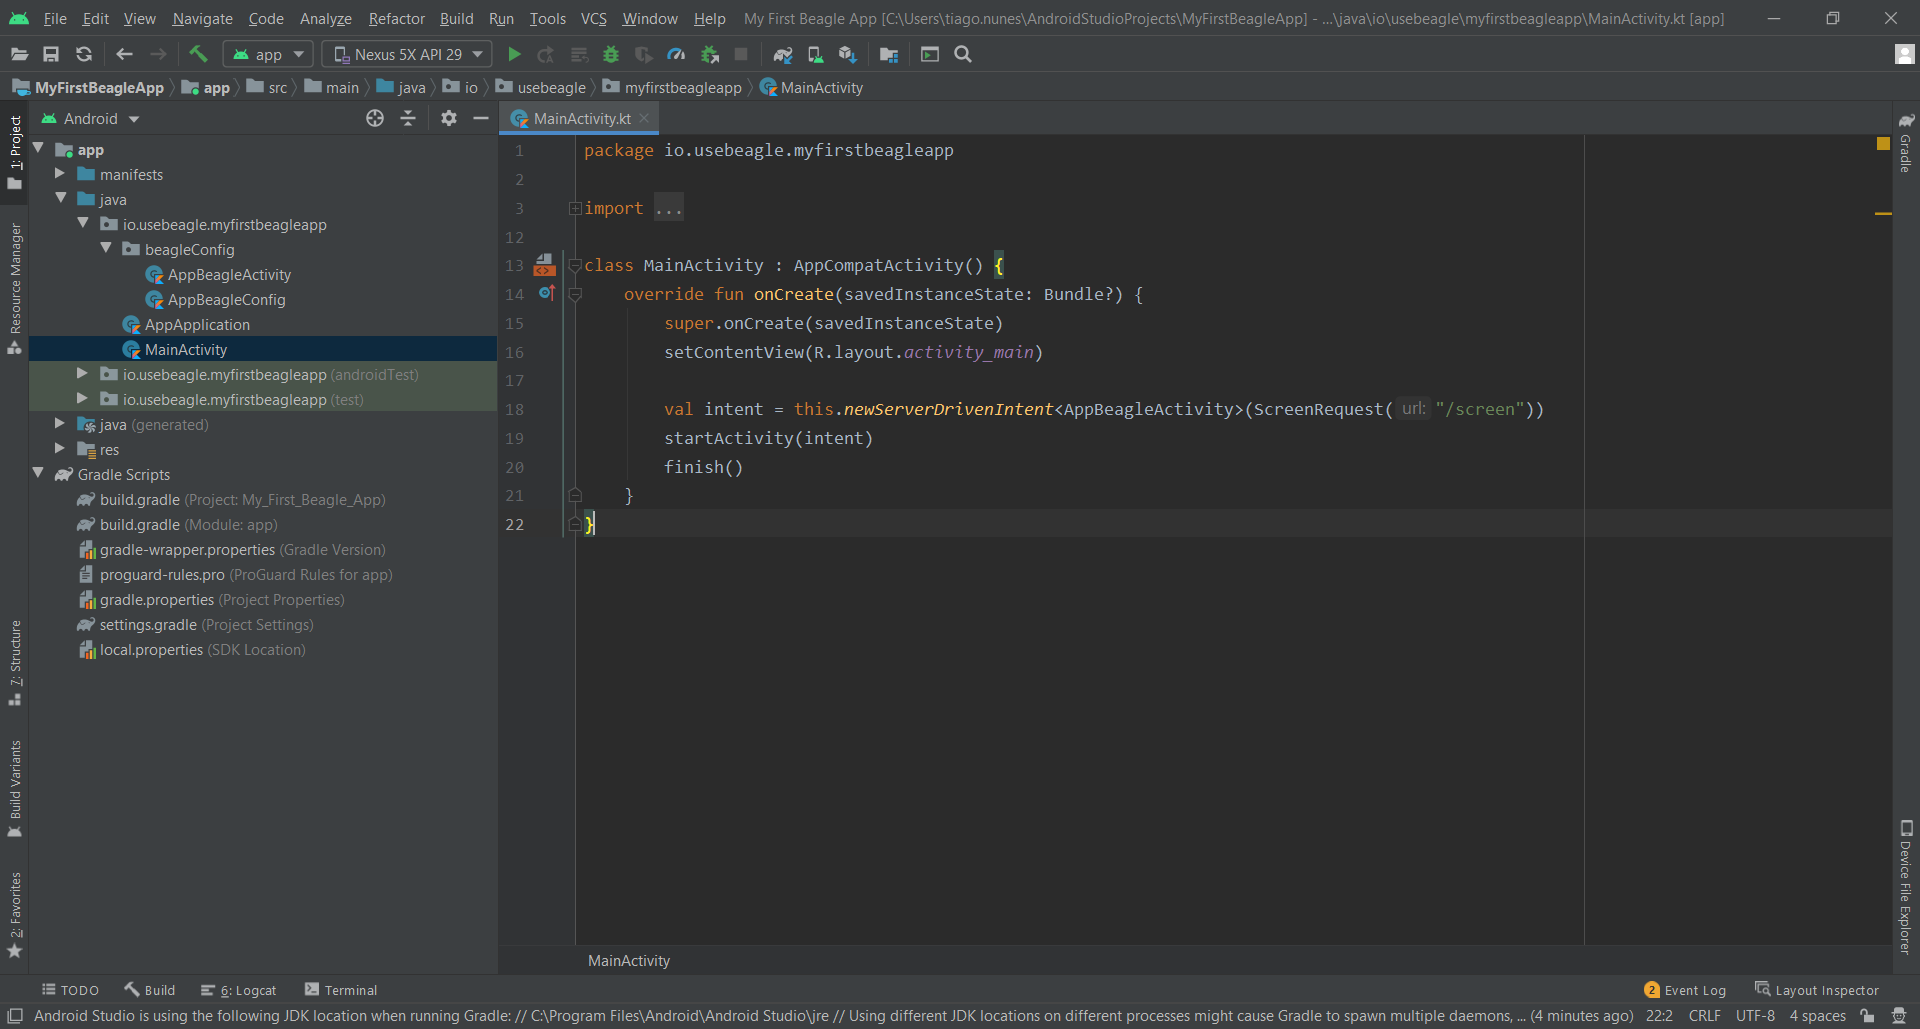
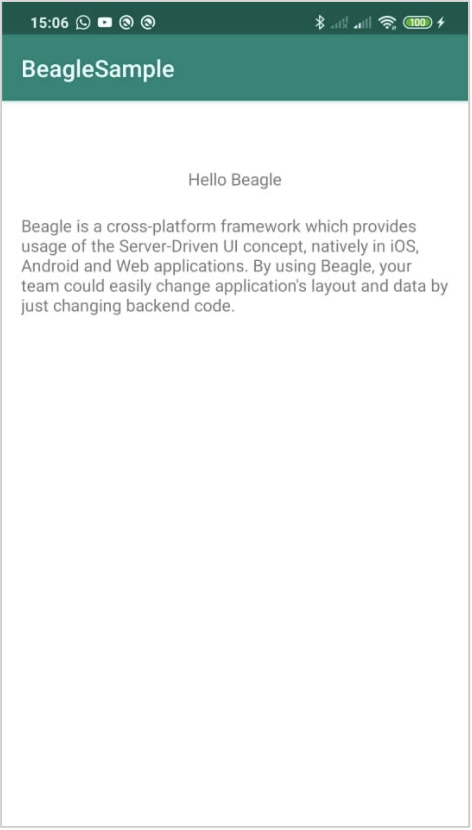
Now you just have to click on Run app and check out your emulator’s screen!
You will see this screen:
Here, you’ll find a tutorial to start an Android project with Beagle.
Here, you’ll find a tutorial to configure a Design System with Beagle for Android.
Was this page helpful?
Glad to hear it! Please tell us how we can improve.
Sorry to hear that. Please tell us how we can improve.