How to use
Settings
After you finish the installation, you need to configure the Angular project to use Beagle. To do this, just follow the steps:
Step 1: Automatic configuration
Run one of the commands below to generate the files that will be used by the Beagle library. You can run the command according to your package manager
yarn beagle init
npx beagle init
After this Beagle will return a question:
- Would you like to use yarn or npm?
Then you should choose the option that you will use as a manager. In our example, we have used yarn, then type yarn and press enter.
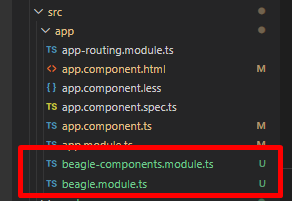
At the end of this process, two new files will be generated in your project:
- beagle-components.module.ts
- beagle.module.ts.
Open the app.module.ts file and then import the Beagle module that has just been generated import {Beagle} from './beagle.module'; and add it within imports:
...
import {Beagle} from './beagle.module';

@NgModule({
  declarations: [
    AppComponent
  ],
  imports: [
    BrowserModule,
    Beagle
  ],
  providers: [],
  bootstrap: [AppComponent]
})
export class AppModule { }
Step 2: Creating the layout definition JSON
Now, you need to create a JSON file that will define the components that will be rendered.
For a better experience you could create your JSON outputsthrough a BFF. You will find how to configure a BFF here. This example uses a JSON that is available in the URL http://usebeagle.io.s3-website-sa-east-1.amazonaws.com/start/welcome:
{
    "_beagleComponent_": "beagle:container",
    "children": [
        {
            "_beagleComponent_":"beagle:text",
            "text":"Hello Beagle"
        },
       {
            "_beagleComponent_":"beagle:text",
            "style":{
              "padding":{
                "top":{
                  "value":10,
                  "type": "REAL"
                }
              }
            },
            "text":"Beagle is a cross-platform framework which provides usage of the server Driven UI concept,natively in iOS, Android and Web applications. By using Beagle, your team could easily change application's layout and data by just changing backend code"
        }
    ]
}
The Beagle library comes with several components ready to be used in your project.
The code above creates a JSON with two for the components container and text.
After creating your JSON, open the file beagle.module.ts generated in the previous step, and enter the remote JSON path as http://usebeagle.io.s3-website-sa-east-1.amazonaws.com/start/ in the baseUrl
import { BeagleModule } from '@zup-it/beagle-angular'
// import all the components you wish to use with Beagle.

@BeagleModule({
  baseUrl: 'http://usebeagle.io.s3-website-sa-east-1.amazonaws.com/start/',
  module: {
    path: './beagle-components.module',
    name: 'BeagleComponentsModule',
  },
  components: {
    // Associate every beagle component to your angular component.
  },
})
export class Beagle {}
And that is it. The configuration is finished and now we will learn how to render the components mapped in a JSON.
Step 3: Using beagle-remote-view
After JSON is created, you need to specify, within the application, the location where the components will be rendered. To perform this action, the Beagle library provides the component <beagle-remote-view>.
Open the file app.component.html and replace all content with the following code, in the route add the path relative to the remote JSON: / welcome.
<beagle-remote-view route="/welcome"></beagle-remote-view>
route in the code above, tells which route will be loaded. The URL specified here is relative to the baseUrl declared in the configuration.
To learn more about the BeagleRemoteView, checkou out this article.
Example
Testing your application
To test our configuration, you must start yout application running one of the commands below.
ng serves when running your application since it will start it without compiling Beagle files. In order for start up correctly, you must use one of the commands below according to your package manager.If you use npm, run:
npm run serve
If you use yarn, run:
yarn serve
It is very important to restart your application everytime there are changes on any Beagle configuration files.
This process must also be done for any changes made into your mapped components@Input() properties
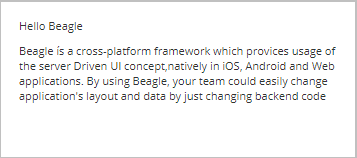
After finishing the command, access the application at: http://localhost: 4200 You should see the following screen:
Feedback
Was this page helpful?
Glad to hear it! Please tell us how we can improve.
Sorry to hear that. Please tell us how we can improve.