Getting Started
Topics covered
- Create an Android project from scratch
- Add Beagle to your project (It can be in an existing project)
- Configure Beagle
- Possible customizations
Requirements:
- Android Studio
- minSdkVersion: 19+
- JDK 11+ language
- Kotlin 1.5+
Starting an Android project
For this example, we’ll use Android Studio IDE. If you haven’t installed it yet, just access the Android documentation and follow the instructions.
After you have installed Android Studio, follow the steps below:
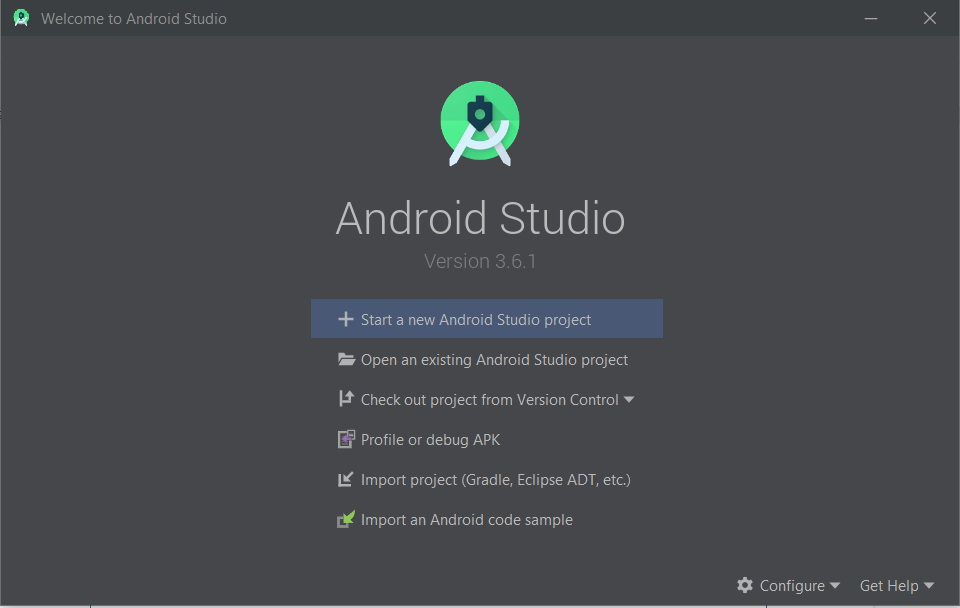
Step 1: Open Android Studio and click on Start a new Android Studio project:
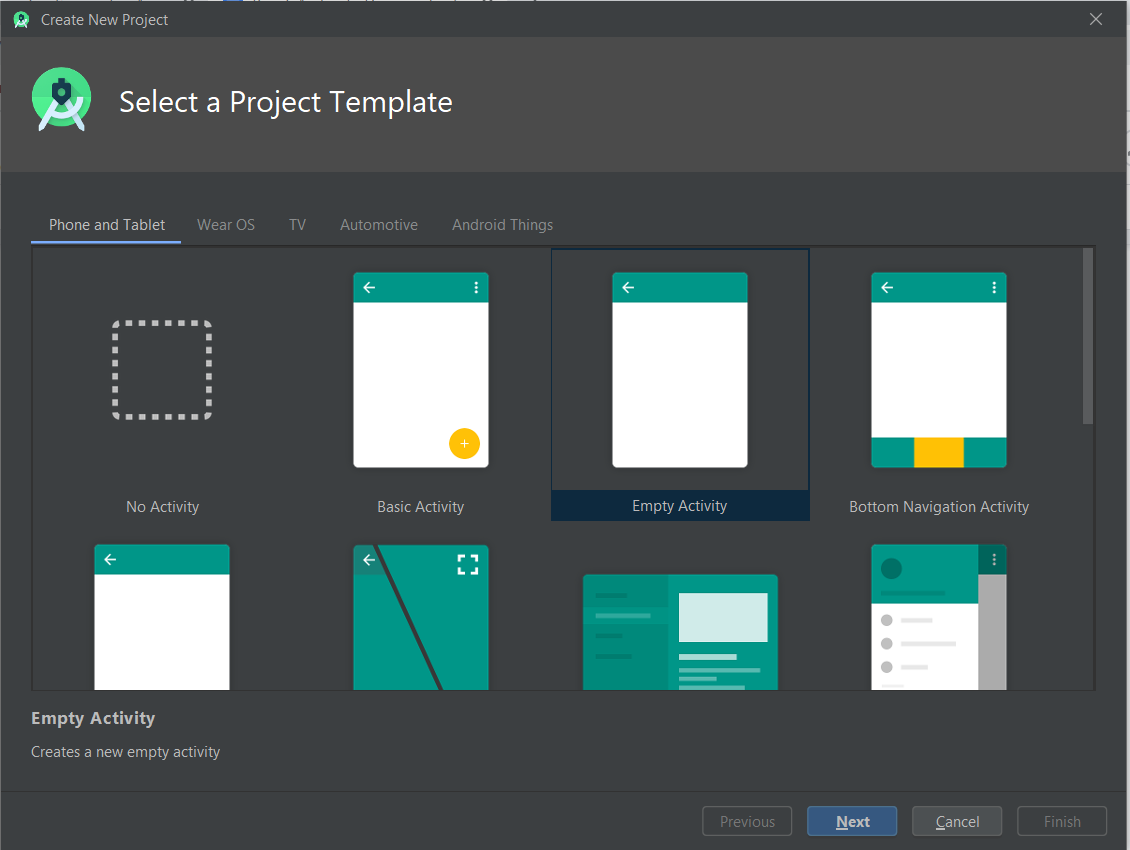
Step 2: Choose the Empty Activity option and click on next:
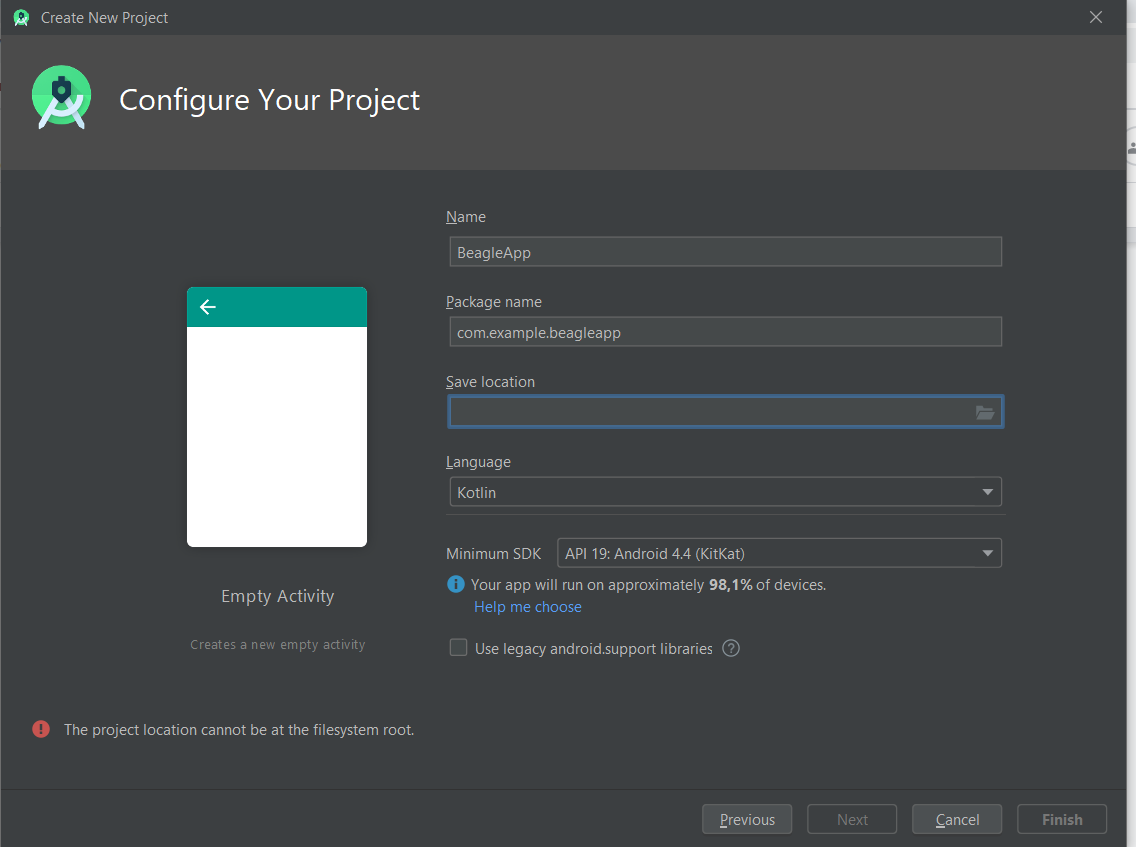
Step 3️: On this page, there is some important information:
- Inform your project’s name. On this example, we’ll call it
BeagleApp. - Choose which language you’ll use. For Beagle, you should go with
Kotlin. - Choose SDK minimum 19 or above, because a lower SDK won’t be compatible.
- Define a package and a Save location according to your preference.
- Click on Next.
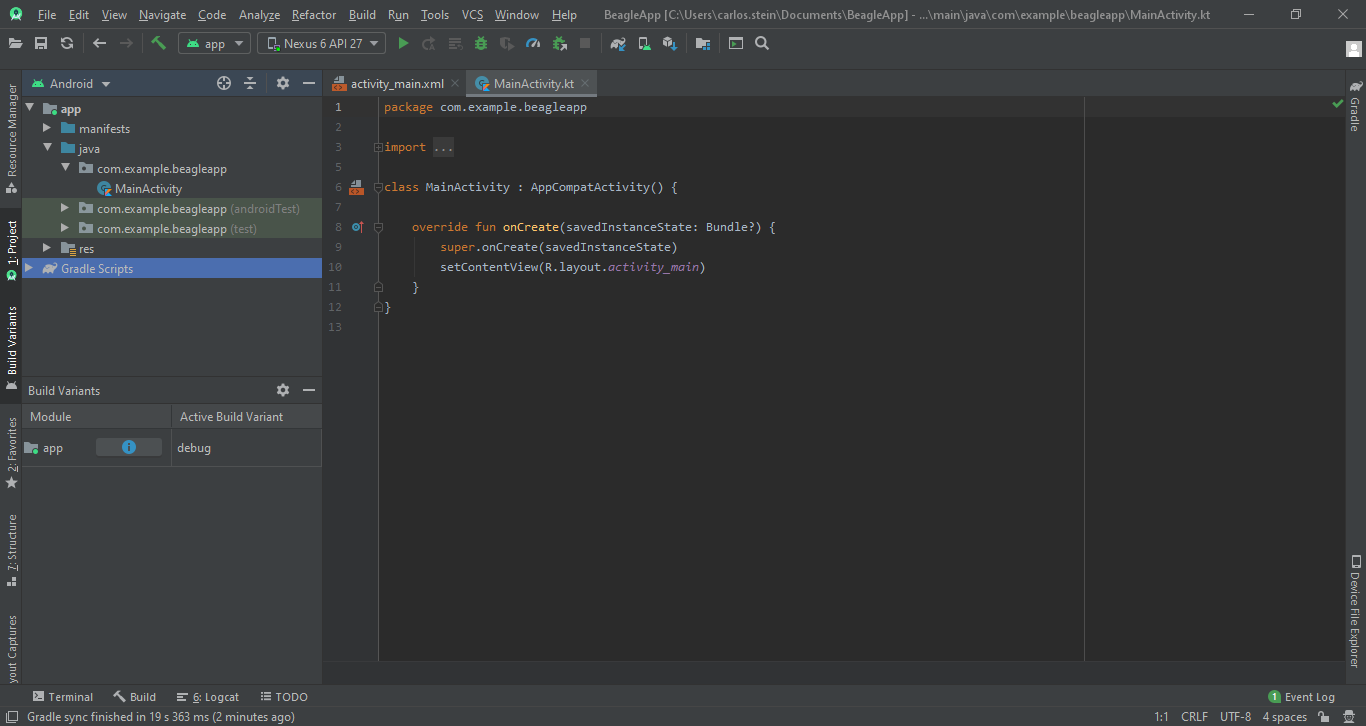
Step 4️: After the previous configurations, Android will take some time to build the project since it will synchronize all dependencies to initialize this project.
Once the initialization is done, you will see this page:
Add Beagle on your project
Step 1: Configure the dependencies
This configuration is perfomed on build.gradle
You must add mavenCentral() in the allprojects repository’s dependencies to set the resource for Beagle. To do so, use the following configuration to download Beagle’s library.
allprojects {
    repositories {
        google()
        mavenCentral()
    }
}
allprojects{}Step 2: Include plugins
Now you need to include the kapt and Beagle's plugin on your dependency manager, check out the example below:
The latest release version of Beagle is:

The following tutorial is for Beagle Android version: v2.1
plugins {
	id 'kotlin-kapt'
}

android {
    kotlinOptions {
        jvmTarget = JavaVersion.VERSION_11
    }
}

ext.beagle_version = "${beagle_version}"

dependencies {
    implementation "br.com.zup.beagle:android:$beagle_version"
    kapt "br.com.zup.beagle:android-processor:$beagle_version"
}
Insert Beagle’s release version to replace ${beagle.version}`, this is necessary to put Beagle’s version highlighted in a blue badge above, without the v character.
For example: ext.beagle.version = v2.1
Configure Beagle
After Beagle’s installation, now you have to make our tool’s usage configuration, follow the steps below:
Step 1: Create a BeagleConfig class
After the update, you have to create a BeagleConfig class and configure your attributes, see the example below:
@BeagleComponent
class AppBeagleConfig : BeagleConfig {
    override val environment: Environment get() = Environment.DEBUG
    override val baseUrl: String get() = "https://myapp.server.com"
}
| Attribute | Type | Definition |
|---|---|---|
| environment | Environment | Attribute responsible for informing Beagle about the current build status of the application. |
| baseUrl | String | Informs the base URL used in Beagle in the application. If you are using the emulator, check here to define this attribute |
BeagleComponent, because Beagle expect them to have empty constructors.Step 2: Create a BeagleSetup
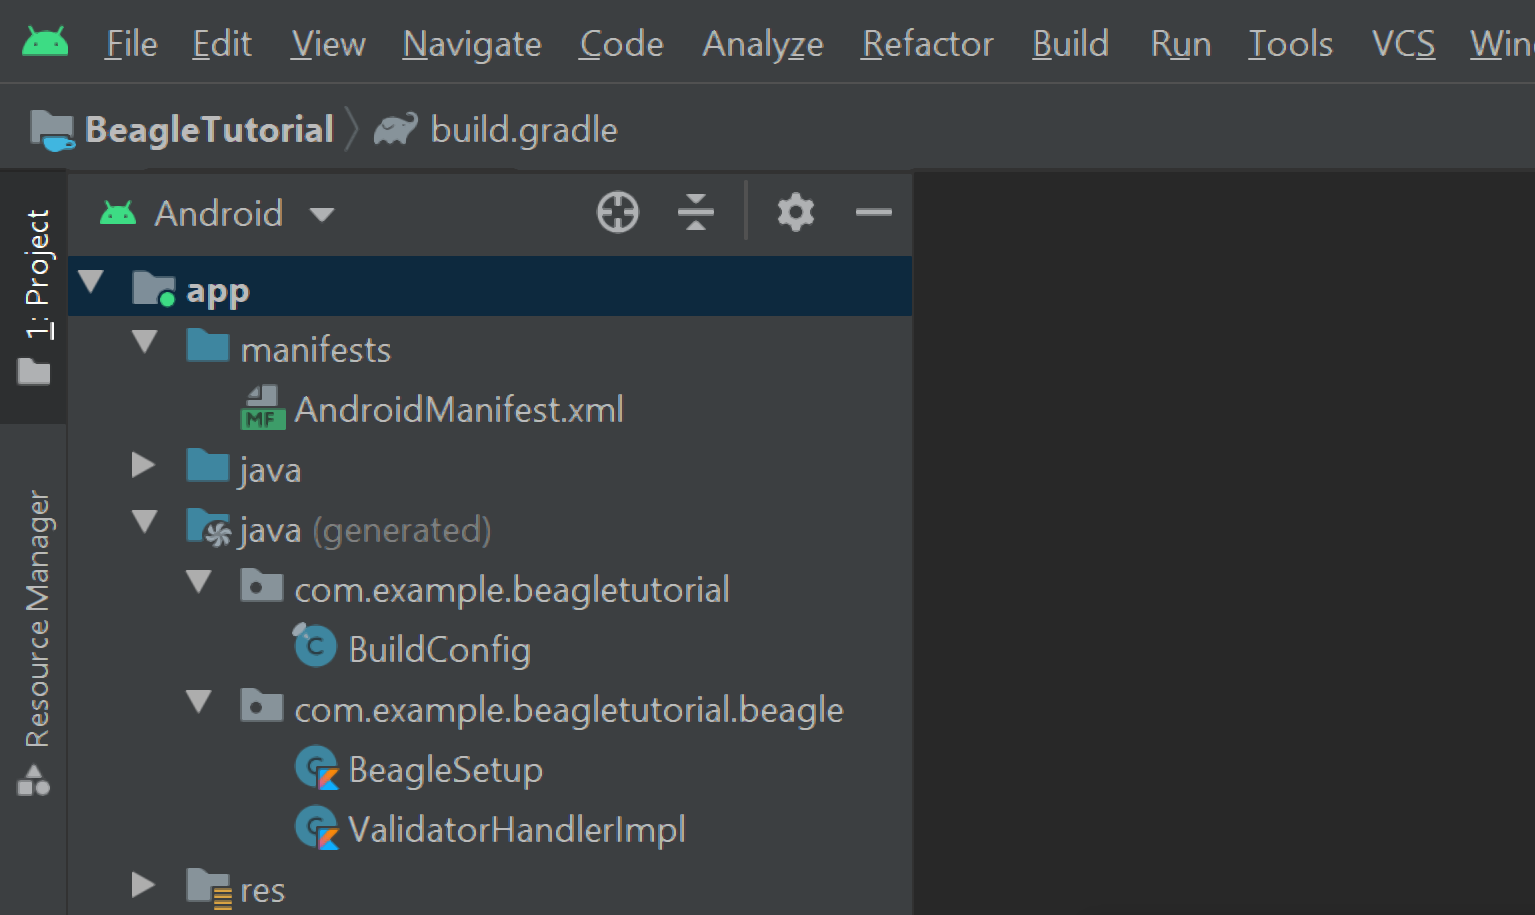
Build your project from the menu (Build > Make Project). Once done, Beagle will have automatically created a BeagleSetup class, see the image below:
Step 3: Create the Application class
At this moment, you should create a Kotlin class that extends the Application class. For this example, the name will be AppApplication.
This class should be named as BeagleSetup().init(this) on onCreate method, according to the list below:
class AppApplication: Application() {

    override fun onCreate() {
        super.onCreate()

        BeagleSetup().init(this)
    }
}
Step 4: Update your Android Manifest.xml
Update your AndroidManifest.xml again and define the AppApplication created as an application’s initialization file. See the example below:
<?xml version="1.0" encoding="utf-8"?>
<manifest xmlns:android="http://schemas.android.com/apk/res/android"
    package="com.example.beagleexamples">

    <uses-permission android:name="android.permission.INTERNET" />

    <application
        android:name=".AppApplication"
        android:usesCleartextTraffic="true"

        ..
android:usesCleartextTraffic="true" property of the application is enabled do allow local requests, because it allows to perform network traffic in plain text, such as HTTPStep 5: Show the screen
Now you can show a screen initialized by a BFF´s Endpoint as following:
    class MainActivity : AppCompatActivity(R.layout.activity_main) {

            override fun onCreate(savedInstanceState: Bundle?, persistentState: PersistableBundle?) {
                super.onCreate(savedInstanceState, persistentState)

                startActivity(newServerDrivenIntent<ServerDrivenActivity>(RequestData("https://usebeagle.io/start/welcome")))
            }
    }
Other Customizations
- Action: You can create custom actions to be executed by your widgets according to the user interaction.
- Navigation Animation: You can customize the enter and exit animations on Beagle navigation.
- Beagle Activity: You can customize the activity that will be displayed when a server-driven screen was called.
- Network Client: You can customize the network client to configure in a way Beagle will make requests.
- Loading and errors treatment: You can customize the error treatment and loading of server-driven screens.
- Proguard: You can optimize and obfuscate your code using Proguard, all settings are already set internally. If you want to create custom components or change any Proguard’s rules, Beagle supports it.
- Deep Link handler: You can configure the Deep Link Handler to navigate from a server-driven screen to a native screen.
- Image Downloader: You can customize how images will be downloaded to be displayed by Beagle.
- Design System: You can customize your design system to build more beautiful screens and Beagle will display them.
- Serializer and Deserializer: You can customize how Beagle will serialize and deserialize.
- Log: You can customize how the logs generated by Beagle will be displayed.
- Widget: You can create more specific components for your project and you can use them to build your server-driven screens.
- Operations: You can create your operations to easily manipulate context by your backend.
- Analytics: You can configure the analytics to generate screen and actions reports.
Feedback
Was this page helpful?
Glad to hear it! Please tell us how we can improve.
Sorry to hear that. Please tell us how we can improve.